You Only Look Once
Table of Contents

1. 物件偵測:不只認得出來,還要框出位置
1.1. 影像分類 vs 物件偵測
我們之前學的 CNN 是做*影像分類*——給一張圖片,回答「這是什麼」。但真實世界中,一張照片裡通常有很多東西:
| 任務 | 輸入 | 輸出 | 範例 |
|---|---|---|---|
| 影像分類 | 一張圖片 | 一個類別標籤 | 「這是一隻貓」 |
| 物件偵測 | 一張圖片 | 多個物件的類別 + 邊界框位置 | 「左邊有貓,右邊有狗」 |
| 語意分割 | 一張圖片 | 每個像素的類別標籤 | 「哪些像素是貓、哪些是背景」 |
物件偵測(Object Detection) 就是在一張圖中找出所有物件,同時回答:
- 圖裡有什麼?(分類)
- 它在哪裡?(定位,用邊界框 bounding box 表示)
1.2. 為什麼叫「You Only Look Once」?
傳統的物件偵測方法(如 R-CNN)要看圖片好幾遍:先提取可能有物體的區域(幾千個候選框),再逐一分類。這就像你在教室裡找手機——先掃視一遍找到可能的位置,再逐一確認。
YOLO 的做法是:*只看一遍就搞定所有事*。它把整張圖片丟進一個神經網路,一次輸出所有物件的位置和類別。這就像開了天眼——一眼就看到教室裡所有物品的位置和名字。
這就是為什麼它叫 YOLO:You Only Look Once(你只需要看一次)。
2. YOLO 的歷史
YOLO 最早由 Joseph Redmon 於 2015 年提出,此後歷經多代演進1:
| 年份 | 版本 | 作者/團隊 | 重要性 |
|---|---|---|---|
| 2015 | YOLOv1 | Joseph Redmon | 開創性的即時物件偵測 |
| 2017 | YOLOv2 | Joseph Redmon | 又名 YOLO9000 |
| 2018 | YOLOv3 | Joseph Redmon | 多尺度偵測 |
| 2020 | YOLOv4 | Bochkovskiy, 王建堯(中研院) | 台灣之光 |
| 2020 | YOLOv5 | Glen Jocher / Ultralytics | PyTorch 實作 |
| 2022 | YOLOv7 | 王建堯(中研院), Bochkovskiy | 再次台灣之光 |
| 2023 | YOLOv8 | Ultralytics | 目前最常用 |
| 2024 | YOLOv9 | 王建堯(中研院), 葉儀晧(北科大) | 三度台灣之光 |
| 2025 | YOLOv12 | Tian, Ye, Doermann | 注意力機制架構 |
值得一提的是,YOLO 的原作者 Joseph Redmon 在 2020 年宣布退出電腦視覺研究,原因是他無法接受 YOLO 不斷被應用在軍事和監控方面。之後,中研院的王建堯團隊成為 YOLO 系列的主要推手之一,YOLOv4、v7、v9 都有台灣團隊的貢獻。
2.1. YOLO 工作原理
YOLO 把物件偵測當成一個*回歸問題*:
- 將圖片切成 S×S 的格子
- 每個格子預測 B 個邊界框(bounding box)和 C 個類別的機率
- 一次前向傳播就完成所有預測
這就像在一張方格紙上,每個格子負責偵測它周圍的物件,最後把所有格子的結果彙整起來。
3. YOLOv8 實作
3.1. 關於 YOLOv8
目前 YOLO 的最新版本為 v12,但為了在教室的 Mac Mini(沒有 GPU)上順暢執行,我們使用 YOLOv8 的輕量版本。
YOLOv8 由 Ultralytics 開發,提供三種功能2:
- 物件偵測(Object Detection)
- 實例分割(Instance Segmentation)
- 影像分類(Image Classification)
3.2. 模型大小選擇
| 名稱 | 大小 | 準確率 | 推理速度 | 適用情境 |
|---|---|---|---|---|
| yolov8n | 小 | 低 | 非常快 | 手機、嵌入式設備 |
| yolov8s | 小 | 中 | 快 | 通用快速識別任務 |
| yolov8m | 中 | 高 | 中 | 準確率與速度平衡 |
| yolov8l | 大 | 更高 | 慢 | 準確率要求較高的任務 |
| yolov8x | 最大 | 最高 | 最慢 | 高準確率、伺服器端推論 |
3.3. 預設可辨識的 80 種物件
官方預訓練模型使用 COCO dataset 訓練,可以辨識 80 種常見物件:
1: from ultralytics import YOLO
2: model = YOLO('yolov8n.pt')
3: # 印出所有可辨識的類別
4: for i, name in model.names.items():
5:     print(f"  {i:2d}: {name}", end="")
6:     if (i + 1) % 5 == 0:
7:         print()
8: print()
包括人、動物(貓、狗、馬、牛⋯)、交通工具(汽車、公車、飛機⋯)、日常用品(手機、鍵盤、剪刀⋯)等。
3.4. 安裝套件
pip install ultralytics
4. 偵測靜態照片
4.1. 本機執行
 1: from ultralytics import YOLO
 2:
 3: # 載入 YOLOv8 nano 模型(首次會自動下載)
 4: model = YOLO("yolov8n.pt")
 5:
 6: # 對圖片進行推論(請換成你自己的圖片路徑)
 7: results = model("your_image.jpg")
 8:
 9: # 顯示結果(會彈出視窗)
10: results[0].show()
4.2. 辨識網路圖片
1: from ultralytics import YOLO
2: model = YOLO("yolov8n.pt")
3:
4: # 直接丟網址也可以!
5: results = model("https://ultralytics.com/images/bus.jpg")
6: results[0].show()
4.3. 在 Colab 執行
如果在 Google Colab 上執行:
!pip install ultralytics
1: from ultralytics import YOLO
2: model = YOLO("yolov8n.pt")
3: results = model("/content/your_image.png")
5. 即時偵測(Webcam)
這是 YOLO 最酷的功能——用攝影機*即時*偵測畫面中的所有物件。
以下程式碼需要在本機的 IDE(如 PyCharm)中執行,不是在 org-mode 裡:
 1: import cv2
 2: from ultralytics import YOLO
 3:
 4: # 載入預訓練模型
 5: model = YOLO("yolov8n.pt")
 6:
 7: # 啟用 webcam(0 = 預設攝影機)
 8: cap = cv2.VideoCapture(0)
 9:
10: if not cap.isOpened():
11:     print("無法打開攝影機")
12:     exit()
13:
14: while True:
15:     ret, frame = cap.read()
16:     if not ret:
17:         print("無法讀取畫面")
18:         break
19:
20:     # 進行 YOLO 偵測
21:     results = model(frame, verbose=False)
22:     annotated_frame = results[0].plot()  # 畫上偵測結果
23:
24:     # 顯示偵測結果
25:     cv2.imshow("YOLOv8 Live Detection", annotated_frame)
26:
27:     # 按下 q 鍵離開
28:     if cv2.waitKey(1) & 0xFF == ord('q'):
29:         break
30:
31: # 釋放資源
32: cap.release()
33: cv2.destroyAllWindows()
6. OpenCV 人臉偵測
OpenCV 也有內建的人臉偵測功能,使用 Haar Cascade 分類器:
 1: import cv2
 2:
 3: # 載入 Haar 人臉偵測模型(OpenCV 內建)
 4: face_cascade = cv2.CascadeClassifier(
 5:     cv2.data.haarcascades + 'haarcascade_frontalface_default.xml'
 6: )
 7:
 8: cap = cv2.VideoCapture(0)
 9: if not cap.isOpened():
10:     print("無法開啟攝影機")
11:     exit()
12:
13: while True:
14:     ret, frame = cap.read()
15:     if not ret:
16:         break
17:
18:     # 轉灰階(人臉偵測在灰階上進行)
19:     gray = cv2.cvtColor(frame, cv2.COLOR_BGR2GRAY)
20:
21:     # 偵測人臉
22:     faces = face_cascade.detectMultiScale(gray, scaleFactor=1.1, minNeighbors=5)
23:
24:     # 畫出人臉位置
25:     for (x, y, w, h) in faces:
26:         cv2.rectangle(frame, (x, y), (x + w, y + h), (0, 255, 0), 2)
27:
28:     cv2.imshow("Face Detection (press q to quit)", frame)
29:     if cv2.waitKey(1) & 0xFF == ord('q'):
30:         break
31:
32: cap.release()
33: cv2.destroyAllWindows()
6.1. YOLO vs OpenCV 比較
| 功能類型 | YOLO | OpenCV |
|---|---|---|
| 物件偵測 | 強大,支援 80 類 | 較弱,需自行訓練 |
| 人臉偵測 | 需訓練或搭配套件 | 內建 Haar/DNN |
| 人臉辨識 | 原生不支援 | 需搭配 dlib/face_recognition |
| 執行效率 | 高(GPU 加速) | 中(適合 CPU) |
| 易用性 | 容易(Ultralytics 很友善) | 較基礎(需手動設定) |
7. YOLO + 人臉辨識
光是偵測到「這裡有一個人」還不夠,如果要知道「這個人是誰」,就需要結合 face_recognition 套件。
7.1. 流程
1. 事前準備:拍攝每個人的照片 → 提取臉部特徵 → 儲存為 encodings.pkl
2. 即時辨識:YOLO 偵測到人 → 擷取臉部區域 → face_recognition 比對 → 顯示姓名
7.2. 安裝套件
pip install face_recognition opencv-python
注意:=face_recognition= 只適合辨識*不戴口罩*的臉,因為它需要完整臉部特徵(包含鼻子和嘴巴)。
7.3. 步驟一:準備照片
各組組員準備 5~10 張不同角度、光線的自拍照片,命名規則為「姓名_編號.jpg」:
images/
├── James_1.jpg
├── James_2.jpg
├── ...
├── Vanessa_1.jpg
├── Vanessa_2.jpg
└── ...
7.4. 步驟二:儲存臉部特徵(save_encodings.py)
這支程式把所有照片的臉部特徵向量和姓名存成 pickle 檔,之後辨識時直接載入就好:
 1: # save_encodings.py
 2: import face_recognition
 3: import os, pickle
 4: from PIL import UnidentifiedImageError
 5:
 6: known_encodings = []
 7: known_names = []
 8:
 9: # ← 請改成你的照片資料夾路徑
10: IMAGE_DIR = "/Users/student/Desktop/images"
11:
12: for file in os.listdir(IMAGE_DIR):
13:     if file.startswith(".") or not file.lower().endswith((".jpg", ".jpeg", ".png")):
14:         continue
15:     name = file.split("_")[0]  # 從檔名取出姓名
16:     try:
17:         img = face_recognition.load_image_file(os.path.join(IMAGE_DIR, file))
18:         encodings = face_recognition.face_encodings(img)
19:         if encodings:
20:             known_encodings.append(encodings[0])
21:             known_names.append(name)
22:             print(f"已處理:{file} → {name}")
23:     except UnidentifiedImageError:
24:         print(f"無法辨識的圖片:{file}")
25:
26: # 儲存特徵
27: output_path = os.path.join(IMAGE_DIR, "encodings.pkl")
28: with open(output_path, "wb") as f:
29:     pickle.dump((known_encodings, known_names), f)
30: print(f"\n已儲存 {len(known_names)} 筆臉部特徵到 {output_path}")
7.5. 步驟三:即時人臉辨識(realtime_recognition.py)
 1: # realtime_recognition.py
 2: import pickle
 3: import cv2, face_recognition
 4: from ultralytics import YOLO
 5:
 6: # ← 請改成你的 encodings.pkl 路徑
 7: with open("/Users/student/Desktop/images/encodings.pkl", "rb") as f:
 8:     known_encodings, known_names = pickle.load(f)
 9:
10: model = YOLO("yolov8n.pt")
11: cap = cv2.VideoCapture(0)
12:
13: while True:
14:     ret, frame = cap.read()
15:     if not ret:
16:         break
17:     results = model(frame, verbose=False)
18:
19:     for box in results[0].boxes.xyxy:
20:         x1, y1, x2, y2 = map(int, box)
21:         face_img = frame[y1:y2, x1:x2]
22:         rgb_face = cv2.cvtColor(face_img, cv2.COLOR_BGR2RGB)
23:
24:         encodings = face_recognition.face_encodings(rgb_face)
25:         if encodings:
26:             match = face_recognition.compare_faces(known_encodings, encodings[0])
27:             name = known_names[match.index(True)] if True in match else "Unknown"
28:             cv2.putText(frame, name, (x1, y1-10),
29:                         cv2.FONT_HERSHEY_SIMPLEX, 0.8, (0, 255, 0), 2)
30:
31:     cv2.imshow("Face Recognition + YOLO", frame)
32:     if cv2.waitKey(1) & 0xFF == ord('q'):
33:         break
34:
35: cap.release()
36: cv2.destroyAllWindows()
7.6. 中文姓名顯示
OpenCV 預設字型不支援中文。如果要顯示中文姓名(例如「王小明_1.jpg」),需要用 PIL 的字型:
 1: # realtime_recognition_zh.py
 2: from PIL import ImageFont, ImageDraw, Image
 3: import cv2, face_recognition, platform, pickle
 4: from ultralytics import YOLO
 5: import numpy as np
 6:
 7: # 根據作業系統選擇中文字型
 8: system = platform.system()
 9: if system == "Windows":
10:     font_path = "C:/Windows/Fonts/msjh.ttc"
11: elif system == "Darwin":  # macOS
12:     font_path = "/System/Library/Fonts/STHeiti Medium.ttc"
13: else:  # Linux
14:     font_path = "/usr/share/fonts/truetype/noto/NotoSansCJK-Regular.ttc"
15: font = ImageFont.truetype(font_path, 32)
16:
17: # ← 請改成你的路徑
18: with open("/Users/student/Desktop/images/encodings.pkl", "rb") as f:
19:     known_encodings, known_names = pickle.load(f)
20:
21: model = YOLO("yolov8n.pt")
22: cap = cv2.VideoCapture(0)
23:
24: while True:
25:     ret, frame = cap.read()
26:     if not ret:
27:         break
28:     results = model(frame, verbose=False)
29:
30:     for box in results[0].boxes.xyxy:
31:         x1, y1, x2, y2 = map(int, box)
32:         face_img = frame[y1:y2, x1:x2]
33:         rgb_face = cv2.cvtColor(face_img, cv2.COLOR_BGR2RGB)
34:
35:         encodings = face_recognition.face_encodings(rgb_face)
36:         if encodings:
37:             match = face_recognition.compare_faces(known_encodings, encodings[0])
38:             name = known_names[match.index(True)] if True in match else "未知"
39:
40:             # 用 PIL 畫中文字
41:             frame_pil = Image.fromarray(cv2.cvtColor(frame, cv2.COLOR_BGR2RGB))
42:             draw = ImageDraw.Draw(frame_pil)
43:             draw.text((x1, y1 - 40), name, font=font, fill=(0, 255, 0))
44:             frame = cv2.cvtColor(np.array(frame_pil), cv2.COLOR_RGB2BGR)
45:
46:     cv2.imshow("Face Recognition + YOLO", frame)
47:     if cv2.waitKey(1) & 0xFF == ord('q'):
48:         break
49:
50: cap.release()
51: cv2.destroyAllWindows()
7.7. YOLO 物件偵測 + 人臉辨識(合體版)
如果想同時辨識人臉(顯示姓名)和其他物件(貓、狗、車等),邏輯如下:
- 用 YOLO 偵測所有物件
- 如果偵測到 person(class_id=0),就用 face_recognition 進一步辨識是誰
- 其他物件正常顯示 YOLO 的類別標籤
 1: # yolo_face_combined.py
 2: import cv2, pickle, platform
 3: import face_recognition
 4: from ultralytics import YOLO
 5: from PIL import Image, ImageDraw, ImageFont
 6: import numpy as np
 7:
 8: model = YOLO("yolov8n.pt")
 9:
10: # ← 請改成你的路徑
11: with open("/Users/student/Desktop/images/encodings.pkl", "rb") as f:
12:     known_encodings, known_names = pickle.load(f)
13:
14: system = platform.system()
15: if system == "Windows":
16:     font_path = "C:/Windows/Fonts/msjh.ttc"
17: elif system == "Darwin":
18:     font_path = "/System/Library/Fonts/STHeiti Medium.ttc"
19: else:
20:     font_path = "/usr/share/fonts/truetype/noto/NotoSansCJK-Regular.ttc"
21: font = ImageFont.truetype(font_path, 28)
22:
23: cap = cv2.VideoCapture(0)
24:
25: while True:
26:     ret, frame = cap.read()
27:     if not ret:
28:         break
29:
30:     results = model(frame, verbose=False)
31:     boxes = results[0].boxes
32:     cls_names = results[0].names
33:
34:     image_pil = Image.fromarray(cv2.cvtColor(frame, cv2.COLOR_BGR2RGB))
35:     draw = ImageDraw.Draw(image_pil)
36:
37:     for i, box in enumerate(boxes.xyxy):
38:         x1, y1, x2, y2 = map(int, box.tolist())
39:         cls_id = int(boxes.cls[i])
40:
41:         if cls_id == 0:  # 是人 → 做人臉辨識
42:             face_img = frame[y1:y2, x1:x2]
43:             rgb_face = cv2.cvtColor(face_img, cv2.COLOR_BGR2RGB)
44:             encodings = face_recognition.face_encodings(rgb_face)
45:
46:             name = "未知"
47:             if encodings:
48:                 matches = face_recognition.compare_faces(known_encodings, encodings[0])
49:                 if True in matches:
50:                     name = known_names[matches.index(True)]
51:
52:             draw.rectangle([(x1, y1), (x2, y2)], outline="green", width=3)
53:             draw.text((x1, y1 - 30), name, font=font, fill=(0, 255, 0))
54:         else:  # 其他物件 → 顯示 YOLO 標籤
55:             label = cls_names[cls_id]
56:             draw.rectangle([(x1, y1), (x2, y2)], outline="blue", width=3)
57:             draw.text((x1, y1 - 30), label, font=font, fill=(0, 0, 255))
58:
59:     frame = cv2.cvtColor(np.array(image_pil), cv2.COLOR_RGB2BGR)
60:     cv2.imshow("YOLO + Face Recognition", frame)
61:     if cv2.waitKey(1) & 0xFF == ord('q'):
62:         break
63:
64: cap.release()
65: cv2.destroyAllWindows()
8. 訓練自己的 YOLO 模型
YOLO 預設能辨識 80 種物件,但如果你想辨識自訂物品(例如學生證、原子筆),就需要自己準備資料來訓練。
8.1. 設計流程
準備照片 → 標註物件位置 → 生成 data.yaml → 訓練模型 → 測試模型
8.2. 步驟一:建立資料夾結構
在你的專案資料夾下建立以下結構:
YOLO/
├── main.py
├── data.yaml
├── images/
│   ├── train/    ← 訓練用圖片(每種物件至少 10 張)
│   └── val/      ← 驗證用圖片(每種物件至少 5 張)
└── labels/
    ├── train/    ← 訓練圖片的標註檔(.txt)
    └── val/      ← 驗證圖片的標註檔(.txt)
8.3. 步驟二:準備圖片
為每種要辨識的物件拍攝照片,注意:
- 不同角度、不同光線、不同背景
- 命名規則:=物件名稱_編號.jpg=(例如 =CoffeeCup_1.jpg=)
- 訓練和驗證要用*不同*的照片,否則會過擬合
8.4. 步驟三:標註物件位置
使用 makesense.ai 網站來標註每張圖片中物件的邊界框:
上傳圖片到 makesense.ai
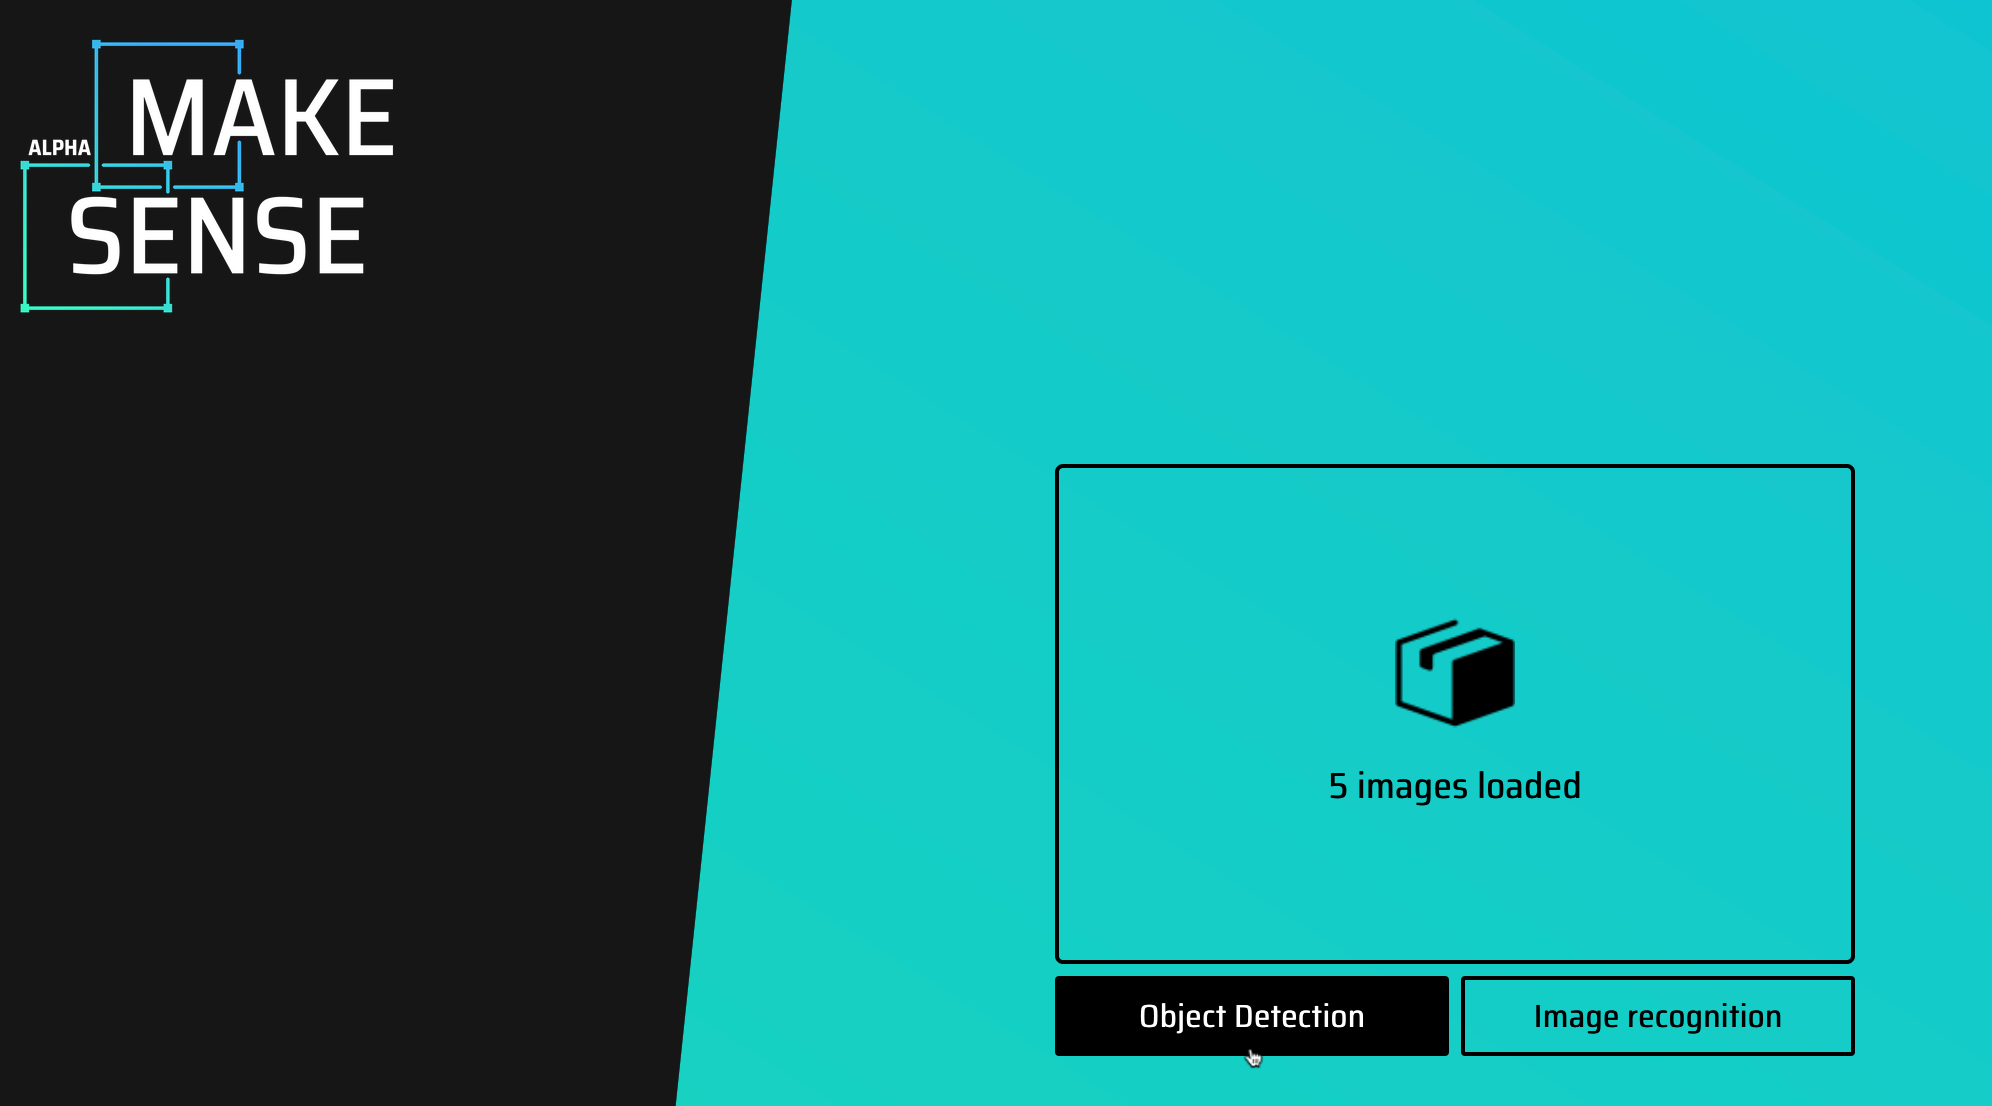
Figure 1: makesense.ai 上傳圖片
- 加入 label 名稱,然後逐一標註每張圖片的物件邊界框
下載標註結果(選擇 YOLO 格式)
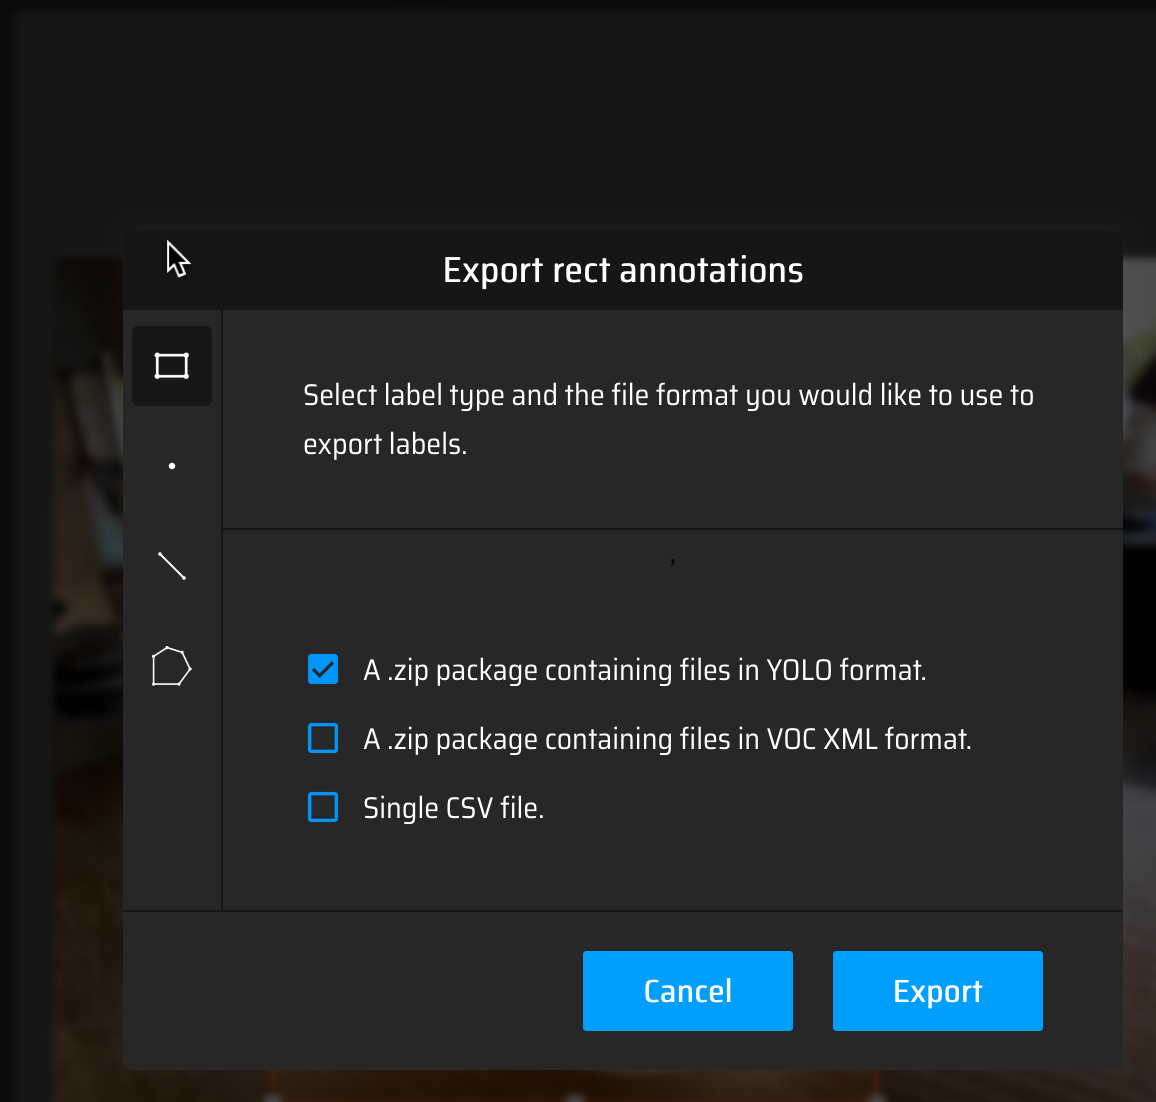
Figure 2: 以 YOLO 格式下載標註
分別標註 train 和 val 的圖片,把下載的 .txt 檔放入對應的
labels/train和labels/val資料夾

Figure 3: 完成後的資料夾結構
8.5. 步驟四:編輯 data.yaml
建立 data.yaml 設定檔,告訴 YOLO 你的資料在哪裡:
train: /Users/student/Desktop/YOLO/images/train
val: /Users/student/Desktop/YOLO/images/val
nc: 2
names: ['CoffeeCup', 'KeyChain']
nc: 物件種類數量names: 所有的物件標籤名稱(就是你在 makesense.ai 中設定的 label)
8.6. 步驟五:訓練模型
在終端機中執行:
yolo detect train model=yolov8n.pt data=data.yaml epochs=50 imgsz=640
訓練完成後會看到類似以下輸出:
50 epochs completed in 0.15 hours.
Results saved to runs/detect/train/
訓練結果(包括模型權重)會存在 runs/detect/train/weights/ 資料夾中。
8.7. 步驟六:測試模型
 1: # test_custom_model.py
 2: import cv2, platform
 3: import numpy as np
 4: from PIL import Image, ImageDraw, ImageFont
 5: from ultralytics import YOLO
 6:
 7: # ← 請改成你訓練出的模型路徑
 8: model = YOLO("runs/detect/train/weights/best.pt")
 9:
10: # 中文字型
11: system = platform.system()
12: if system == "Windows":
13:     font_path = "C:/Windows/Fonts/msjh.ttc"
14: elif system == "Darwin":
15:     font_path = "/System/Library/Fonts/STHeiti Medium.ttc"
16: else:
17:     font_path = "/usr/share/fonts/truetype/noto/NotoSansCJK-Regular.ttc"
18: font = ImageFont.truetype(font_path, 28)
19:
20: cap = cv2.VideoCapture(0)
21: cap.set(cv2.CAP_PROP_FRAME_WIDTH, 640)
22: cap.set(cv2.CAP_PROP_FRAME_HEIGHT, 480)
23:
24: while True:
25:     ret, frame = cap.read()
26:     if not ret:
27:         break
28:
29:     results = model(frame, conf=0.1, verbose=False)
30:
31:     image_pil = Image.fromarray(cv2.cvtColor(frame, cv2.COLOR_BGR2RGB))
32:     draw = ImageDraw.Draw(image_pil)
33:
34:     for box in results[0].boxes:
35:         cls_id = int(box.cls[0])
36:         conf = float(box.conf[0])
37:         label = f"{model.names[cls_id]} ({conf:.2f})"
38:         x1, y1, x2, y2 = map(int, box.xyxy[0])
39:         draw.rectangle([(x1, y1), (x2, y2)], outline=(255, 0, 0), width=3)
40:         draw.text((x1, y1 - 30), label, font=font, fill=(255, 0, 0))
41:
42:     annotated = cv2.cvtColor(np.array(image_pil), cv2.COLOR_RGB2BGR)
43:     cv2.imshow("YOLOv8 Custom Detection", annotated)
44:
45:     key = cv2.waitKey(1) & 0xFF
46:     if key == ord('q'):
47:         break
48:     elif key == ord('s'):
49:         cv2.imwrite("snapshot.jpg", frame)
50:         print("已儲存畫面 snapshot.jpg")
51:
52: cap.release()
53: cv2.destroyAllWindows()
.gif)
Figure 4: YOLO 自訂物件偵測成果
8.8. 結合 YOLO 原本的辨識功能
如果想同時使用原本的 80 類偵測和你自訂的物件偵測,可以同時載入兩個模型:
 1: # dual_model_detection.py
 2: import cv2, platform
 3: import numpy as np
 4: from PIL import Image, ImageDraw, ImageFont
 5: from ultralytics import YOLO
 6:
 7: # 兩個模型
 8: model_coco = YOLO("yolov8n.pt")       # 原生 80 類
 9: model_custom = YOLO("runs/detect/train/weights/best.pt")  # 自訓模型
10:
11: system = platform.system()
12: if system == "Windows":
13:     font_path = "C:/Windows/Fonts/msjh.ttc"
14: elif system == "Darwin":
15:     font_path = "/System/Library/Fonts/STHeiti Medium.ttc"
16: else:
17:     font_path = "/usr/share/fonts/truetype/noto/NotoSansCJK-Regular.ttc"
18: font = ImageFont.truetype(font_path, 28)
19:
20: cap = cv2.VideoCapture(0)
21:
22: while True:
23:     ret, frame = cap.read()
24:     if not ret:
25:         break
26:
27:     results_coco = model_coco(frame, conf=0.3, verbose=False)
28:     results_custom = model_custom(frame, conf=0.1, verbose=False)
29:
30:     image_pil = Image.fromarray(cv2.cvtColor(frame, cv2.COLOR_BGR2RGB))
31:     draw = ImageDraw.Draw(image_pil)
32:
33:     # COCO 結果(藍框)
34:     for box in results_coco[0].boxes:
35:         cls_id = int(box.cls[0])
36:         conf = float(box.conf[0])
37:         label = f"{model_coco.names[cls_id]} ({conf:.2f})"
38:         x1, y1, x2, y2 = map(int, box.xyxy[0])
39:         draw.rectangle([(x1, y1), (x2, y2)], outline=(0, 0, 255), width=2)
40:         draw.text((x1, y1 - 30), label, font=font, fill=(0, 0, 255))
41:
42:     # 自訓結果(紅框)
43:     for box in results_custom[0].boxes:
44:         cls_id = int(box.cls[0])
45:         conf = float(box.conf[0])
46:         label = f"{model_custom.names[cls_id]} ({conf:.2f})"
47:         x1, y1, x2, y2 = map(int, box.xyxy[0])
48:         draw.rectangle([(x1, y1), (x2, y2)], outline=(255, 0, 0), width=3)
49:         draw.text((x1, y1 - 30), label, font=font, fill=(255, 0, 0))
50:
51:     annotated = cv2.cvtColor(np.array(image_pil), cv2.COLOR_RGB2BGR)
52:     cv2.imshow("COCO + Custom Model", annotated)
53:     if cv2.waitKey(1) & 0xFF == ord('q'):
54:         break
55:
56: cap.release()
57: cv2.destroyAllWindows()
.gif)
Figure 5: YOLO 雙模型偵測成果
9. 進階:偵測後觸發動作
偵測到特定物件時,可以讓電腦做出反應(例如播放聲音、截圖等):
 1: # alert_detection.py
 2: import threading
 3: import subprocess
 4: import cv2
 5: from ultralytics import YOLO
 6:
 7: model = YOLO("yolov8n.pt")
 8:
 9: target_class = "person"
10: target_class_id = list(model.names.values()).index(target_class)
11:
12: cap = cv2.VideoCapture(0)
13:
14: def beep():
15:     """在背景執行播放聲音,不會卡住畫面"""
16:     subprocess.run(["afplay", "/System/Library/Sounds/Glass.aiff"])
17:
18: while True:
19:     ret, frame = cap.read()
20:     if not ret:
21:         break
22:
23:     results = model(frame, verbose=False)
24:     annotated = results[0].plot()
25:
26:     class_ids = results[0].boxes.cls.cpu().numpy().astype(int) \
27:         if results[0].boxes.cls is not None else []
28:
29:     # 偵測到目標就發出聲音
30:     if target_class_id in class_ids:
31:         threading.Thread(target=beep).start()
32:
33:     cv2.imshow("YOLOv8 Alert Detection", annotated)
34:     if cv2.waitKey(1) & 0xFF == ord('q'):
35:         break
36:
37: cap.release()
38: cv2.destroyAllWindows()
重點:用 threading.Thread 在背景播放聲音,不會卡住 webcam 畫面。
10. 擴充應用場景
| 應用 | 做法 |
|---|---|
| 辨識是誰 | YOLO + face_recognition(需臉部特徵資料庫) |
| 有沒有戴口罩 | YOLO 自訓 or 搭配 CNN 分類器 |
| 穿什麼顏色衣服 | OpenCV HSV 顏色過濾 |
| 偵測舉手、姿勢 | YOLOv8-pose(支援骨架偵測) |
| 自動點名系統 | YOLO + face_recognition + 資料庫 |
| 門禁刷臉 | YOLO + face_recognition + GPIO 控制 |
| 安全帽偵測 | YOLO 自訓模型 |
11. 小結
| 概念 | 說明 |
|---|---|
| 物件偵測 | 找出圖片中所有物件的類別和位置 |
| YOLO | You Only Look Once,一次前向傳播完成所有偵測 |
| YOLOv8 | Ultralytics 開發,目前最常用的版本 |
| 邊界框 | Bounding Box,用矩形框標出物件位置 |
| COCO dataset | 80 類物件的標準資料集 |
| face_recognition | 臉部辨識套件,可辨識「這個人是誰」 |
| makesense.ai | 線上標註工具,可標記物件邊界框 |
| data.yaml | 告訴 YOLO 資料集結構的設定檔 |
12. 作業
12.1. 作業一:YOLO 偵探日記
使用 YOLOv8 的預訓練模型偵測你身邊的物品。
步驟:
- 用手機拍攝 3 張不同場景的照片(例如:教室、家裡客廳、書桌)
- 用 YOLO 模型偵測每張照片中的物件
- 記錄偵測結果
你需要寫的程式碼(參考起始碼):
 1: from ultralytics import YOLO
 2:
 3: model = YOLO("yolov8n.pt")
 4: results = model("your_photo.jpg")
 5:
 6: # 印出偵測結果
 7: for box in results[0].boxes:
 8:     cls_id = int(box.cls[0])
 9:     conf = float(box.conf[0])
10:     print(f"  {model.names[cls_id]}: {conf:.1%}")
11:
12: results[0].show()
預期輸出格式:
照片 1(教室):
  偵測到 5 個物件:
  - person: 95.2%
  - chair: 87.1%
  - laptop: 82.3%
  - keyboard: 76.4%
  - mouse: 68.9%

照片 2(客廳):
  偵測到 3 個物件:
  - couch: 91.0%
  - tv: 88.5%
  - remote: 45.2%  ← 信心度較低

照片 3(書桌):
  偵測到 4 個物件:...

分析:
  - 哪些物件被成功偵測?哪些漏掉了?
  - 信心度最低的是哪個物件?為什麼你覺得它信心度低?
  - YOLO 有沒有「認錯」的情況?
12.2. 作業二:打造組員辨識系統
完成人臉辨識系統的完整流程。
步驟:
- 每位組員拍 5~10 張不同角度的自拍照,命名為
姓名_n.jpg - 執行
save_encodings.py建立臉部特徵資料庫 - 執行
realtime_recognition.py進行即時辨識 - 測試以下情境並記錄結果:
- 正面對著攝影機
- 側臉
- 戴眼鏡 vs 不戴眼鏡
- 光線明亮 vs 光線昏暗
- 正面對著攝影機
預期輸出格式:
組員人數:4 人
照片總數:32 張

辨識測試結果:
| 情境         | 辨識成功率 |
|--------------+------------|
| 正面         | 4/4        |
| 側臉         | 2/4        |
| 戴眼鏡       | 3/4        |
| 光線昏暗     | 1/4        |

分析:
  - 哪些情況辨識率最高?為什麼?
  - 哪些情況辨識失敗?可能的原因?
  - 如果要改善辨識率,你覺得可以怎麼做?
12.3. 作業三:自訂 YOLO 物件偵測
訓練你自己的 YOLO 模型來偵測自訂物品。
基本要求:
- 可以即時辨識所有組員,並顯示組員姓名
- 可以即時辨識至少*三種物品*(其中必須包括學生證)
進階要求(加分):
- 當偵測到特定物品時,播放一段音效(提示:用
threading避免畫面卡住) - 當偵測到學生證時,自動截圖並儲存到桌面
繳交內容:
1. 訓練資料截圖(makesense.ai 標註畫面)
2. data.yaml 的內容
3. 訓練結果的 mAP50 數值(從訓練輸出中找到)
4. 即時偵測的成果截圖或錄影(至少包含 3 種自訂物品)
5. 程式碼(.py 檔案)